You’ve finally thought about building your dream PC set up and you’re looking forward to owning one. The good news is that you don’t have to be tech-savvy to know how to build a PC. Even beginners can mix and match their own PC rig. There are system builders online that would help you envision your PC build and it lets you know if they are compatible. Most people who first tried building their PC builds are scared of breaking their hard-earned expensive PC parts. Beginners often feel overwhelmed with the wirings of the motherboard. But hey, there’s always a first time and it’s normal! As soon as you pick up those PC parts and start installing them, you’ll get confident along the way each time you install the parts. There’s no need to worry because this Ultimate Guide on How to Build a PC for Beginners will help non-tech-savvy people in building a PC with confidence.
Main Image: jcomp on Freepik
Table of Contents
What is your Purpose in Building a PC
What Computer Parts Do You Need?
Building the PC parts together
What is your Purpose in Building a PC
The first thing you need to consider when building a PC, is how you’re going to utilize it. Regardless of your purpose (home office, hardcore gaming, or high-demand editing) every PC still contains the same parts for it to function.
 Your goal for your PC is for general use, matched with a combination of budget-friendly components that would be sufficient for surfing the web, Microsoft apps, and video streaming, which is most typical for work from home setups. In case your PC system demands high-power rendering, editing, designing, or gaming, it would be best and safe to choose mid-range to powerful PC specs to achieve maximum productivity and efficiency without compromising. The more powerful your PC becomes, the more it becomes pricier.

Most common PC usage:
-Lightweight Usage
-Surfing the Web
-Video Streaming
-Microsoft Apps (Word, PowerPoint, Excel)
-Sending Emails
-Working
-Gaming
-2D & 3D Graphic Design (Adobe Photoshop, Illustrator, InDesign, XD)
-Illustration (Adobe Photoshop, Illustrator)
-Photo Editing (Adobe Lightroom, Photoshop)
-Video Editing (Adobe Premiere Pro, Vegas Pro, After Effects)
-2D & 3D Animation (Adobe Animate, After Effects, Cinema 4D, Blender)
PC Build Tools You Need
Gather the tools you need in building the PC. A magnetic screwdriver is highly-recommended so you won’t miss all your screws or drop it all over the place. Having a non-magnetic screwdriver makes assembling a little more challenging. Make sure that your workstation has enough space for you to assemble your PC and an uncarpeted to prevent accidental electrostatic discharge that would damage sensitive components like the CPU and RAM sticks.
Tools that you need:
-Phillips Screwdriver # 2
-Phillips Screwdriver # 1 (for M2 Drives)
-Screw Tray (A magnetic one is recommended)
-Velcro Cable Wraps / Zip ties (For cable management)
-ESD Equipment (Antistatic Tools, Gloves, Grounding Cords)
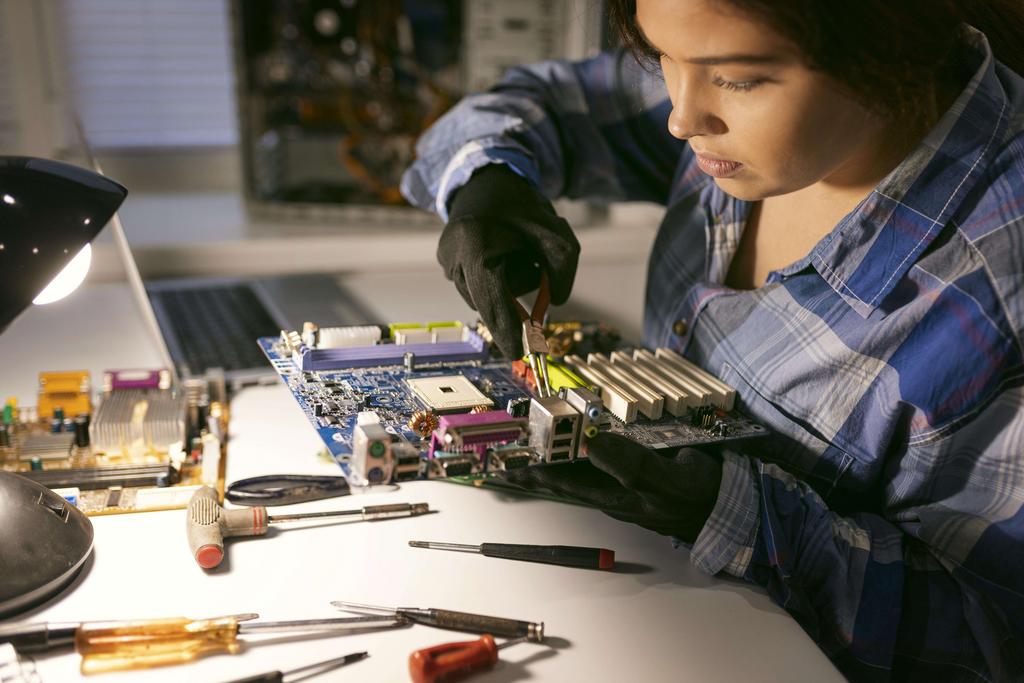
Image by Freepik
What Computer Parts Do You Need?
Below this section are the PC parts that you need to pick to finish your dream setup. Recommended PC parts are also included that would be powerful enough to run all the necessary productivity applications that you need to do like general work, gaming, and high-demand editing.
 If you want to simulate picking the best PC parts you can use a system builder like PCPartPicker. It also determines compatibility build issues to help you pick the best PC parts for your system build.
PC Case
PC Case serves as the body that holds all of your components together. The main things to consider when picking a PC case are size, airflow, and design. PC cases come in three different sizes (Mini-tower, Mid-Tower, and Full-tower.) Your PC case size should fit your motherboard since case sizes are not standardized. But if you want a safe option, mid-tower is a perfect size that is proven and tested to fit all the computer parts. Most airflow cases are built with mesh and typically hold more fans to reduce heat in your system to its maximum capabilities, especially with high-demand usage especially in hot weather. If airflow doesn’t seem a problem for you, a PC case with a tempered glass design would be the perfect case to show off your flashy LED PC setup.
Pro-tip: Pick a case that would suit your aesthetics, taste, but with good airflow. You wouldn’t want to fry your PC components!
Motherboard
The motherboard serves as the ‘heart’ of the computer. All of your components are connected to the motherboard. Similar to the heart, it pumps signals, allows electricity, and powers your PC components to keep it running and functioning. When picking a motherboard, make sure your CPU’s chipset and socket matches your motherboard. An Intel CPU is built differently compared to a Ryzen CPU so make sure to pick a motherboard that supports the type of CPU that you prefer.
Pro-tip: For example, if you prefer an Intel CPU make sure to buy a Motherboard that supports Intel’s socket and chipset (vice versa with AMD CPUs.)
CPU (Central Processing Unit)
Let me get this straight, a lot of people mistakenly identify the CPU as the whole PC system, but no. The CPU or the Processor is the small square chip that you put in the center of the motherboard. If the motherboard serves as the ‘heart’, the CPU serves as the brain of the computer. It processes all the information that you do on the computer. From the smallest things like moving your mouse cursor around the desktop, to doing heavy rendering and editing, it all comes down to the CPUs responsibility to process and execute all the things you do.
Recommended CPU:
General Use = Intel Core i3 10th Gen or Ryzen 3 to 5 series would suffice.
Min. recommendation for hardcore gaming or rendering = Intel Core i5 10th Gen or Ryzen 5 to 7 series
Best recommendation for gaming and rendering = Intel Core i9 or Ryzen 9 series
GPU (Graphics Processing Unit)
The GPU, Graphics Processing Unit or most commonly known as the Graphics Card is the most raved PC component by computer techno geeks and gamers. The GPU delivers power to high-demand PC usage that is most commonly used for gaming, graphics computation, rendering, video editing and animation. Although your computer can still run without a GPU because modern CPUs have built-in integrated graphics which you can even game with and still get decent frame rates or FPS. But of course, if you want the maximum performance for high-demand activities for your PC, it is highly recommended to buy a GPU instead of relying on your CPUs integrated graphics.
Recommended GPU:
General Use = A GTX 1050-Ti or RX 570 or even your CPUs Integrated graphics would suffice.
Min. recommendation for hardcore gaming or rendering = RTX 2060 or RX 6600.
Best recommendation for gaming and rendering = RTX 3090 or RX 6900-XT
RAM (Random Access Memory)
The RAM or the Random Access Memory is one of the most important PC components that determines your computer’s performance. For starters, if you try to edit a spreadsheet while having a meeting with your workmates, and sending an email at once, it’s the responsibility of the RAM to allow you to multitask while doing that at once. The speed and performance of the RAM varies on the amount of RAM you have installed in your system. The more RAM memory you have, the more applications that you can run and open without experiencing lag.
Pro-tip: A DDR3 RAM is sufficient for general use. But in today’s technology, a DDR4 RAM would be a better option.
Recommended RAM:
General Use = 4GB to 8GB RAM DDR4 RAM would be enough.
Min. recommendation for hardcore gaming or rendering = 8GB to 16GB DDR4 RAM
Best recommendation for high-demand rendering = 32GB to 64GB DDR4 RAM would be best.
PSU (Power Supply Unit)
The PSU or Power Supply Unit is a hardware that sometimes confuses people. Despite the name ‘Power’ Supply Unit, it does not supply your system with power, but instead it converts power and regulates tolerable voltage output for modern PC components. Picking the right PSU also matters which components you choose. The more powerful your PC is the higher PSU watts are required to keep your system without running into complications.
Pro-tip #1: Using a PSU Watt Calculator helps you determine how much PSU Watts you need to efficiently power your PC system.
Pro-tip #2: It is a general rule to get a PSU Wattage higher than what your computer power consumes rather than trying to match the amount of power your PC system will draw. If your system draws about 500 Watts, a 600–750-watt power supply would give you an overhead to work with.
Storage
There are two types of storage for a computer system. The SSD (Solid State Drive) and the HDD (Hard Disk Drive.), SSD is significantly faster than the HDD and it’s the best place to store your operating system for faster booting. Your PC can still operate without an SSD but it is important for graphic designer, video editors, animators, and even gamers to have their preferred productive application installed in the SSD to have quicker rendering, loading, and exporting. An SSD with 250GB to 1TB storage is the optimal option for your system. The HDD also has its strengths as it holds bigger storages for your rendered and exported files like photos, videos, animations, and even for games.
Recommended Storages:
General Use = 1TB of HDD is sufficient.
Min. recommendation for hardcore gaming or rendering = 1TB of HDD + 250GB if SSD is enough.
Best recommendation for gaming and rendering = 2TB of HDD (or more) + 1TB of SSD (or more)
Cooling
From the name itself, cooling reduces ambient temperature inside of your PC case and promotes good airflow. If your fans are facing backwards, then it pushes hot air outside your PC case. This also works the other way around. There are also water-cooling or liquid cooling systems for PCs that lower the temperature of your CPU and GPU. Instead of traditional air cooling, it uses water that allows computers to run at a powerful speed while reducing system noise and reduces heat more efficiently. This makes it a go-to with high-demand pc activities, without worrying about your components overheating.
Pro-Tip: Hot air rises, so it’s better to have your exhaust fans mounted on the top vent (if your PC case has one) to maximize cooling. Side-mounted fans should be used for air intake.
Monitor
Monitor displays the things you work on, like Windows, Explorer, and other applications. Monitors come in different sizes, refresh rates, and resolutions and picking the right monitor for your productive activities is a must.
If you intend to use the computer for general usage or work, a single monitor with at least 22” would suffice your productivity needs. On the other side of the road, if you’re in to hardcore gaming is your purpose that prefers performance over quality, get a monitor that has at least 25” with a 120hz – 144hz display. You should consider quality over performance in the long-run, preferably a 4K Ultra-wide monitor is the best for you. For graphic design and the like, get at least a 4K UHD Monitor with accurate color display is highly recommended for your setup.
Pro-Tip: Are two monitors better than one? Personally, yes. Especially if you intend to use it for multitasking and productivity usage, but not so much for gaming.
Peripherals
The peripherals are the external devices that you use to do the actions you need to do to your computer. These peripherals are commonly known as the keyboard, mouse, headset/headphones or speakers, and if you are graphic designer or an illustrator you can add a drawing tablet to your peripherals.
Pro-Tip: At the end of the day, peripherals come down to preference. Choose whatever mouse, keyboard, and sound system that you are comfortable with.
Building the PC parts together
The most thrilling part of building your PC is knowing your computer successfully booted and getting a sigh of relief after all of the anxiety and nervousness while patching your PC parts together. Before jumping into the unknown, you have to get hands-on first in building your components. It may seem intimidating at first because there’s a lot of wires to connect. Think of it as inserting the right shapes to the right holes when you were young. 
Clean your Workspace
The first thing to do is to have a spacious and clean workspace. Be sure to stand on a non-carpeted floor to prevent any electrostatic discharge and preferably work on a table with a wooden tabletop to avoid unwanted damage to your system.
CPU Installation
To get things started, you need to get your motherboard ready. You can use the box as a surface for your motherboard when you install your CPU. It is crucial to not touch the little gold pins (or contacts) on the CPU. It’s possible that you could bend or destroy a pin and it is overly sensitive and bodily residues like sweat or oil can damage the little gold pins or contacts.
Step 1: Push down and pull the lever or prongs on the socket of the motherboard, to lift up the retention plate where you sit your CPU down.
Step 2: Look for the little golden triangle at the sides of your CPU chipset, same for the motherboard. The little golden triangle is an indicator where to face and position your CPU at the motherboard. It is important to apply no force when sitting in your CPU, letting it naturally drop and connect with the socket. To check if the CPU is properly installed, do a little wiggle to your CPU and if it doesn’t budge it is perfectly placed.
Step 3: Drop the retention plate, then bring the lever or prongs down then pull putting it back under the retention mechanism, like how you first saw the motherboard before putting in the CPU. Then the retention plate will come off naturally and you are done installing the CPU. Easy right?
Pro-Tip: Keep the retention plate so you can send back your motherboard to the manufacturer in case you experience complications.
RAM Installation
Installing the RAM sticks is one of the most satisfying experiences when building a PC. Hearing your RAM stick click to the motherboard is the sound of success.
Before hearing those clicks, you must carefully check the position of the notch before lining your RAM to fit it to the motherboard slot. Pull back the tabs on the motherboard, line it up to the slot, then push it firmly from both ends until you hear the satisfying click. When you hear the click, it means that your RAM is secured and installed.
Storage Installation
There are two types of SSD, M.2 and SATA. The physical difference between the two is; an M.2 drive is a mini card layout that is identical to a shape of doublemint chewing gum, and a SATA is similar to an HDD in terms of layout and shape but a bit slimmer.
M.2 SSD
Look for the empty slot on your motherboard for your M.2 drive, it typically has more than one, sometimes three slots. Check out your motherboard’s manual if you have a hard time looking for it. Once you’ve located it, install the M.2 drive and mount it onto the slot, then screw the drive to secure it in place.
SATA SSD
Installing a SATA SSD is completely different from the M.2 drive. You can attach your SATA drive on one of the empty drive bays (usually seen on the sides or the bottom of the PC case) and screw the SATA drive from underneath the empty bay. Second, look for the SATA power cable on your motherboard and plug it in to your drive.
HDD (Hard Disk Drive)
Similar to the SATA SSD, look for an empty drive bay for your HDD, screw your drive from underneath, then hook up your HDD to one of the SATA cables on your motherboard and you’re basically done installing your HDD.
Cooling
There are three types of cooling that your PC can utilize. Air CPU Cooling, AIO (All-in-one) CPU Liquid Cooling, and your case fans. So, every cooler installation would be different and here are the steps on how to install them.
Back to the CPU, take the backplate of the CPU Air Cooler out of the box and align them accordingly at the back of the motherboard. Since the CPU is hypersensitive, make sure to install spacers on the motherboard to ensure the right amount of pressure being applied on the CPU once the cooler is installed. Depending on the airflow pressure you chose for your PC, install the mounting bars accordingly on top of the spacers and screw in the thumb nuts to hold the mounting bars in place.
Before you place your air cooler, apply a proper amount, preferably a pea size of thermal paste (the silver-gray gooey stuff in a syringe that significantly helps with cooling) on top of the CPU. Then place the air cooler on top of the CPU and screw it on place.
AIO CPU Liquid Cooler
Similar to the CPU Air Cooler, take the backplate of the AIO CPU Liquid Cooler out of the box and align them accordingly at the back of the motherboard. Screw in the exhaust fans to the radiator before connecting anything to the system. Make sure to install the appropriate circular bracket for your CPU block/Water-block as the circular brackets differ between Intel and AMD motherboards. Mount the radiator at the top vent which is the best spot for exhaust or if you don’t have a top vent, you can mount it at the side vent of your PC Case or wherever you like.
Just like with the AIO Cooler, make sure to install spacers on the motherboard to ensure the right amount of pressure being applied on the CPU. Apply a proper amount, preferably a pea size of thermal paste on top of the CPU and then you can place the copper-like thermal interface off the CPU block on the CPU.
Screw-in the AIO Cooler in place and connect the cables to the designated pins of the motherboard and you’re done installing the cooler.
If you’re wondering if “where’s the liquid installation part?” Well, you cannot open the cooler to add or replace the liquid in the AIO Liquid Cooler because they aren’t meant to be opened and it comes with filled water-glycol mix that serves as the liquid pumping around your cooler.
PC Case Fan
When installing a PC Case Fan, consider the type of air pressure you want inside your PC. After you’ve figured it out on how you want your fans to be installed, look for the fan hub typically located at the side panel, bottom, rear of your PC case. Next, install your fans according to their designated area and position and screw them up to your fan hub. The last thing to do is to connect your fans to your motherboard. Every motherboard is different so make sure to check out your motherboard’s manual to know where to connect. After all that is done, you have successfully installed a PC Case Fan.
Motherboard Installation
In installing the motherboard, get the IO shield (a silver plating to guard the motherboard) and install it at the rear part of the PC Case. After that’s done, rest the sides of your PC case like it’s lying down so you won’t have a hard time installing the motherboard. Carefully lower the board to help you avoid any damage to the back of the motherboard and it also helps you estimate the placement of the screws. Before screwing the motherboard into place, make sure to secure the motherboard in position. Lastly, connect all the pins, connectors, and cables from the PC case and fans to the motherboard and you’re basically done.
PSU (Power Supply Unit) Installation
Since you are mostly done installing the EST sensitive components of your build, you can go ahead and start working with your PSU. Make sure to stay away from any conductive electric components, supply, or tools before handling your PSU.
For the installation of the power supply, face the fan side of the PSU where there is ventilation on to the power supply slot of your PC case (commonly found on the lower part or at the side of the PC case.) Slide your PSU in and screw it into place. Then connect your modular cables, connectors, and pins to your motherboard and you are done installing the PSU.
GPU (Graphics Card) Installation
One of the most anticipated PC parts to install by PC builders is the graphics card. “Why is it the last thing to install if it is the most anticipated?” Well, graphics cards, especially the modern and powerful ones, tend to be heavier and bulky. If you install the GPU before installing the motherboard to the PC case, your graphics card will just get in the way of things making it place the rest of the PC Components.
Installing the graphics card is simple and straightforward. All you have to do is look for the PCIe slot on your motherboard, which is easy to spot because the GPU has the biggest slot in the motherboard. Before you install the GPU, line it up to the PCIe slot and measure which of the expansion slot covers (a space that is located at the back of your case.) that you will need to remove so your GPU will fit with the motherboard and case. After that, firmly press the card down to the PCIe slot until it fully sits and you’ll hear a click from the latch of the slot, which means your GPU is installed properly. Lastly, connect the power connectors of the motherboard to the GPU and voila! You’re done installing the graphics card.

Final Parts
 After you’ve successfully installed all of the PC parts altogether, make sure to properly connect your cables, pins and connectors. Then make sure that your PC is running smoothly. Place back the windows, side panels of the PC case, and screw everything back. Boot up your PC and you’re done.
Congratulations! You’ve successfully built your first PC system. Now, if you are thinking of getting an ergonomic chair to pair up with your PC setup, check out this list of top ergonomic chairs to buy to help you decide which is best for you.
Working at home with your new PC is cool, but if you need a change of pace, go out and be productive in a coworking space near you. Check out Weremote and become a valuable part of a community where success is not just encouraged but cultivated. Reach out to us at hello@weremote.com and be part of our community today.
Weremote stands as a community where professionals and businesses thrive, offering a dynamic environment for growth. As the coworking brand of Wrkspace Office Management and Solutions Inc., Weremote continues to foster professional development and build vibrant communities. Weremote is a portfolio company of AHG Lab, the largest independent venture builder in the Philippines.
